 AssetCenter
Managing assets
The asset record: overview, current assignments, the lifecycle timeline, and everything under the actions button.
Last updated
Overview
The Overview section provides complete details of the asset.
The first row displays key identifiers and status information, including the asset's category, asset tag, condition, ownership duration and current status.
The second row highlights the asset name.
The third row includes the remaining asset details, along with any custom fields specific to the asset's category.
The fourth row summarizes all cost-related information, including the purchase price, warranty cost, and any event costs such as repair or maintenance expenses associated with the asset.
If your plan includes the AI Asset Assistant, open it while viewing an asset and ask about “this asset” without repeating the asset tag, manufacturer or model. It can use the record's identity, status, condition, assignments, acquisition and configured useful life as context.

Current assignments
The Current Assignments section includes a toggle: by default it shows the assigned person and/or location, and switching the toggle displays any subscriptions linked to the asset.
Along with the name, this section includes a badge indicating how long it has been since the assignment was made.

Timeline
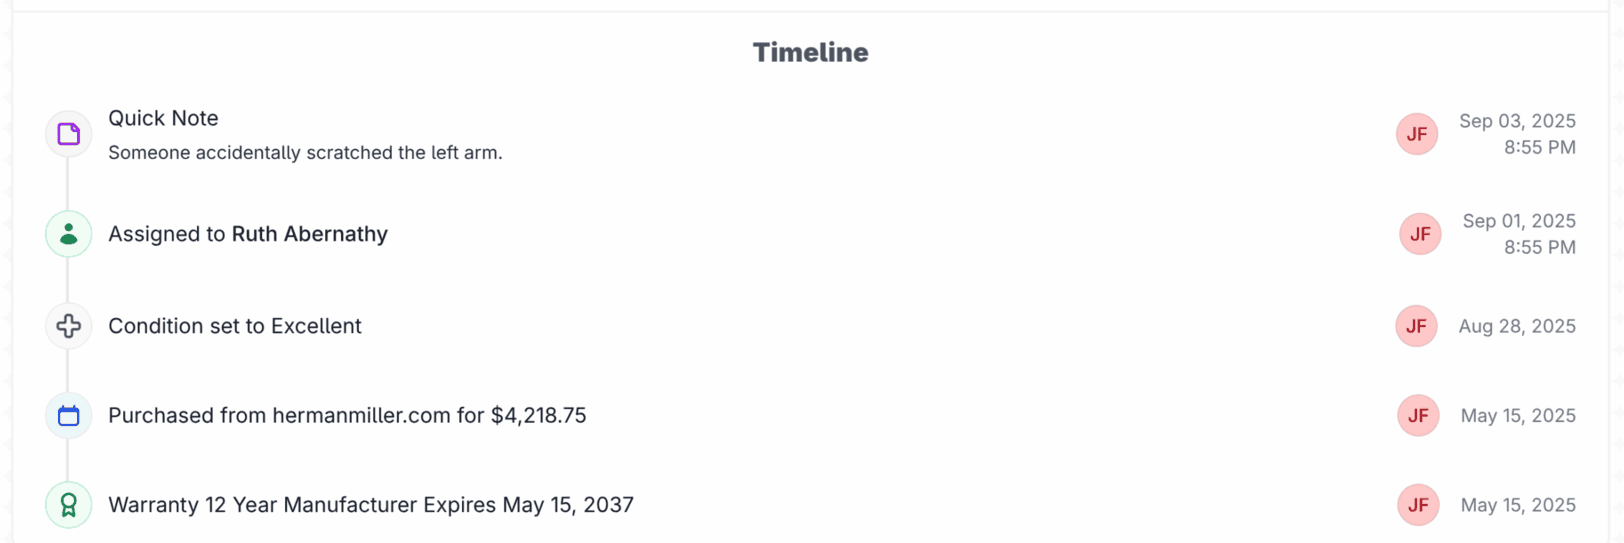
The timeline documents the complete lifecycle of each asset, from acquisition through lifecycle events, to-dos and notes, to final decommission. Every activity is recorded in one place, and each timeline entry can be edited with a single click.
Comments and attachments are supported on all timeline entries. Click any item to edit it, and you can add comments or upload attachments. Timeline items with comments show a comment bubble icon, and items with attachments show a paperclip icon on the activity line.
Actions button
The actions button in the top right corner is how you manage the asset. This is the only button on the page by design: any action you need to perform on the asset is done from the actions button.

The To-do button records a to-do on that asset. If something needs to be completed in the future by you or someone else, this is where you create it. For example, a phone needs a screen replacement, so you create a to-do for that repair.
The Events button tracks the lifecycle of the asset. The system comes with Accidental Damage, Broken, Maintenance, Repair and Vandalism. These events can be customized, and you can create your own on the asset events setup page.
The Quick Note button is simple and straightforward. It creates a timeline entry that is a simple note. Use it for recording informational, one-off events on the asset.
Under the assignments dropdown you can assign a person, a location, subscriptions or a storage location.
Under the lifecycle dropdown, Edit Asset Details is where you update the base details of the asset, such as name, manufacturer and model number.
The New Acquisition button updates the ownership information of the asset. For example, a vehicle is under lease and you purchase it; the new acquisition would be the purchase.
The Add or Renew Warranty button adds or renews a warranty on that asset.
Acquisitions and warranties can also arrive on their own. If your Apple hardware is connected through Apple Business, an asset with nothing on record has its purchase details, and its AppleCare coverage, filled in for you. Anything a person entered is always left alone.
Update Physical Condition records the condition of the asset. These can be customized, but the default options are Excellent, Good, Fair, Poor and Broken.
Decommission events retire the asset from use in your organization. This removes any current assignments and updates the status to whichever event you choose: retired, sold, lost, and so on. The item is then considered no longer in use, and it will have limited options in the actions menu.