 AssetCenter
Asset records in the app
Work with an asset in AssetCenter for iPhone and iPad: its details and assignments, the three action menus, notes, events, to-dos, attachments and the timeline.
Last updated
Open an asset from the Assets list, a search, a scan or a card on Home. The page shows the same record as on the web, and the three buttons in the top right corner hold everything you can do to it.
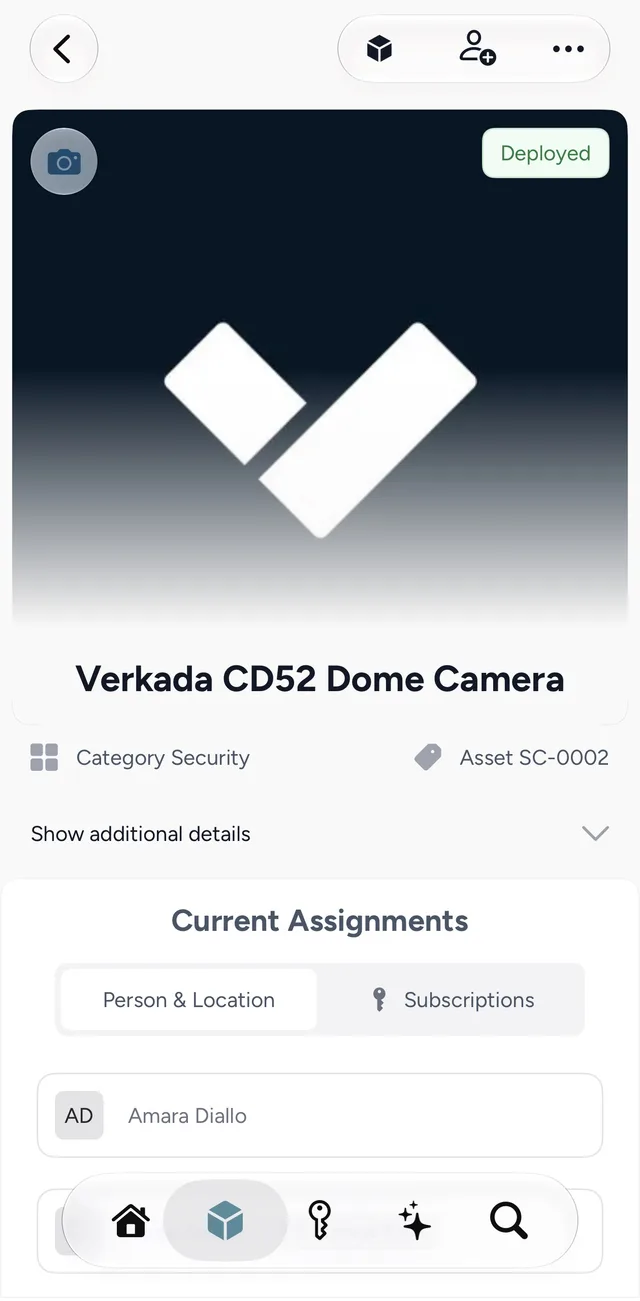
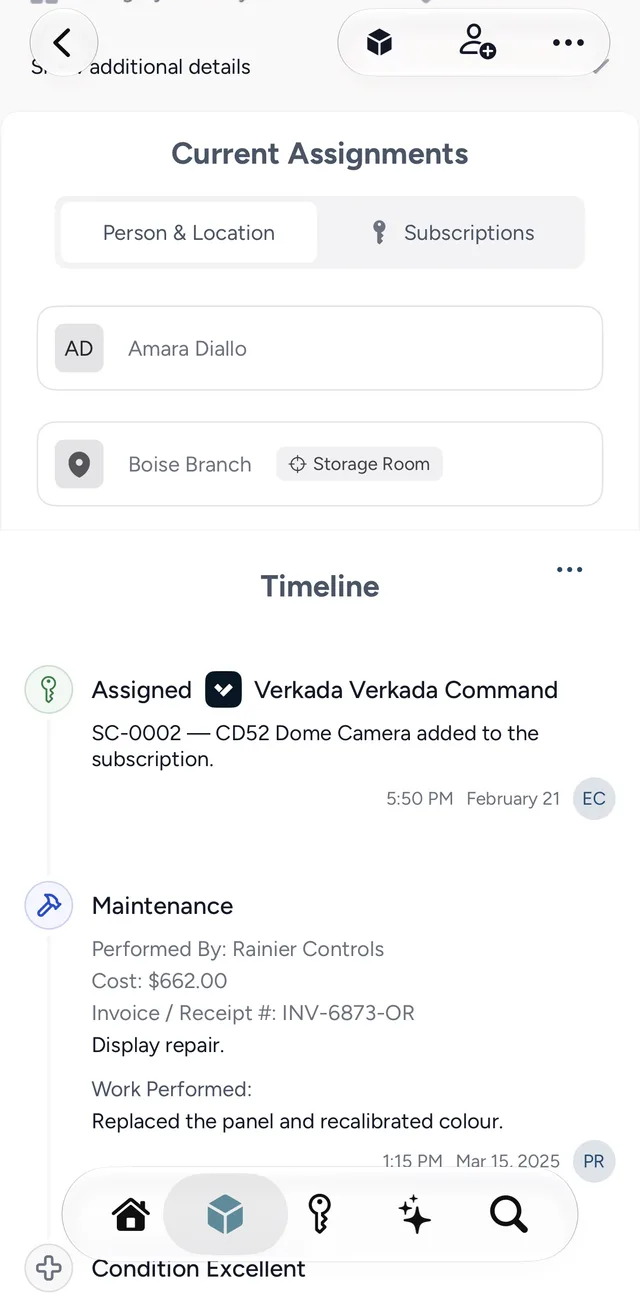
What the page shows
- The image, with the asset's status in the top right corner, such as Available or Deployed, and its name underneath. The camera button in the top left corner opens the image menu: View Image, Update Image from your photo library, and Delete Image.
- Category and Asset, the asset tag.
- Show additional details, which opens the rest of the record: dates, model and serial number, condition, purchase price, warranty, storage, the asset it is a component of, and the category's custom fields.
- Current Assignments, with a switch between Person & Location and Subscriptions. Tap a person, location or subscription to open it. When there are more than six, Show More lists the rest.
- Timeline, the asset's full history, newest first. Older entries load as you scroll down.
For what each part of an asset record means, see managing assets.
The three menus
The cube is for the asset itself:
- Edit Asset Details: category, asset tag, name, manufacturer, model number, serial number, manufacture date and custom fields.
- Quick Note, Event and To-do, described below.
The person with a plus is for assignments:
- Assign Person, or Change Person when someone already has it, and Unassign to take it back.
- Assign Location, or Move Location, and Unassign.
- Move to Storage, or Update Storage and Clear Storage when it is already in storage.
- Manage Subscriptions, to add or remove the subscriptions the asset uses.
The ••• is for the asset's lifecycle:
- New Acquisition, when the asset is bought, leased or otherwise acquired again.
- Add Warranty, or Renew Warranty when it already has one.
- Update Physical Condition.
- Decommission Asset, at the end of its life, or Undo Decommission to bring it back.
- Delete Asset.
A decommissioned asset has no assignment menu, and Event, To-do, warranties and condition updates are hidden until it is brought back.
Recording what happened
Every action opens a sheet with Cancel in the top left corner and Save in the top right. Cancel throws away what you entered without asking.
- Quick Note is one note, dated now.
- Event asks for the Event Type first, such as maintenance or a repair, and then shows that type's own fields. Your organization's event types are set up under Events.
- Assign Person asks for the person and an optional Return Due Date, for a loan. Assign Location asks for the location, a Sublocation if it has spaces, the date, and a Return Date if it applies.
- Move to Storage asks for the storage location and an optional sublocation.
- Add Warranty asks for the Warranty Name, Start Date, cost, end date and billing frequency.
- New Acquisition, Update Physical Condition and Decommission Asset each ask for a type, the date, and that type's fields.
- Manage Subscriptions lists the asset's subscriptions. Add one with the picker or tap Remove; each row shows whether it will be added, removed or left alone, and Undo changes your mind before you save.
Most actions also take notes. Decommissioning and clearing storage ask you to confirm first, and decommissioning removes the asset's person, location and subscription assignments, other than storage. Delete Asset removes the asset and its whole history permanently, after a final check.
Comments and attachments
Notes, events, to-dos, assignments, acquisitions and decommissions have three tabs along the top of the sheet: details, comments and attachments.
- Comments: write in Add a comment… and tap Add Comment. A new entry can carry up to 20 comments of up to 10,000 characters each.
- Attachments: Add Photos picks photos from your library, and Add Files picks PNG, JPEG, PDF, Word or Excel files. Each file can be up to 10 MB, with up to 10 attachments on an entry. Tap an attachment to view it, or use its menu to Rename or Delete it.
To-dos
To-do in the cube menu adds a to-do to the asset. Enter the To-do, choose who it is Assigned To, and add a Due Date and notes if you need them. The person you assign it to is notified. The to-do then appears on the asset's timeline, on their My To-dos card, and on the To-dos screen.
To complete a to-do from the asset, open it from the timeline, tick its checkbox and tap Save. A completed to-do can still be reopened by unticking the box.
The timeline
The ••• beside Timeline filters it to All events, Quick notes, Assignments or Todos. A Now marker separates future entries, such as to-dos that are due, from the past. Assignment changes made within a few minutes of each other are grouped into one entry; tap it to see each one.
Tap an entry to open it in the same sheet it was created in:
- Change it and tap Save.
- Read and add comments on the comments tab. Depending on your permissions, you can reply to, edit or delete a comment.
- If you are allowed to delete the entry, a trash button sits at the bottom of its details. Deleting removes the entry with its comments and attachments, permanently.
Entries carry a paperclip when they have attachments and a speech bubble when they have comments.
Permissions
The app shows every menu to everyone. If your role doesn't allow an action, the app tells you when you open or save it, rather than hiding it. Who can do what is set by an administrator under Users.